Control a Relay With a Raspberry Pi and Python
With this project I wanted to control a motor over the internet. The motor needs 12-24V DC with 1500mA. It is started through an impulse with the same potential as the power supply.
I chose a Raspberry Pi model B for this project, as I had one laying around. As OS I used Raspberry Pi OS Lite on a 8GB SD Card. To control the motor I created a simple Flask API.
Hardware
- Raspberry Pi Model B
- 8GB SD Card
- 5V Relay
- ethernet cable or wifi dongle
- power supply
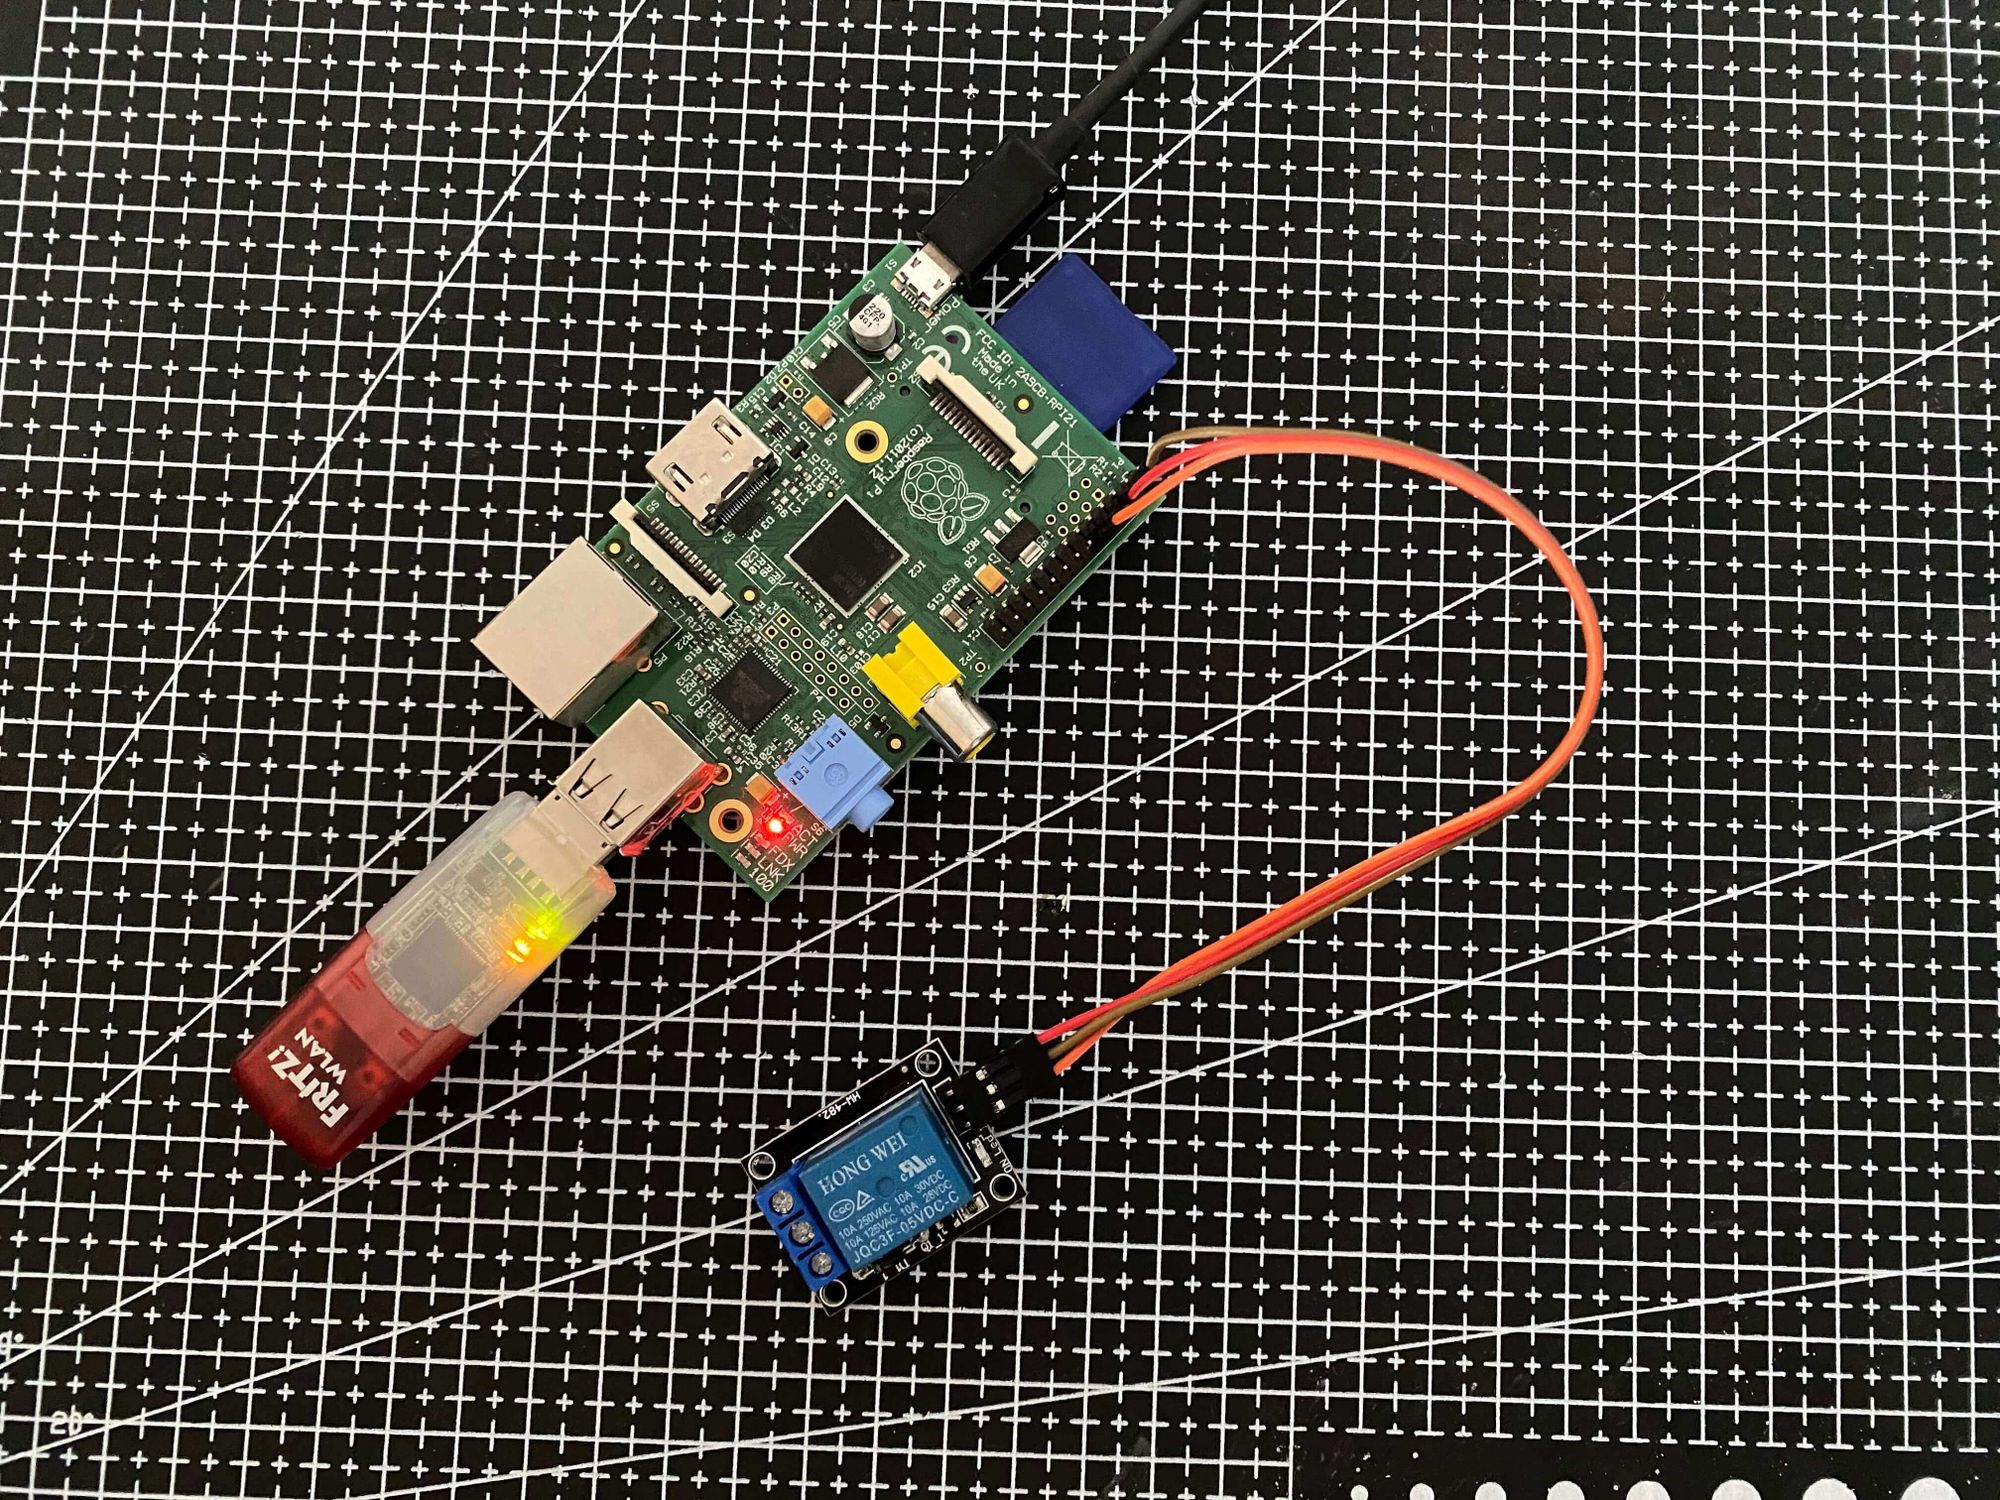
Demo
You can see the relay being control through the flashing red led and by the click sound.
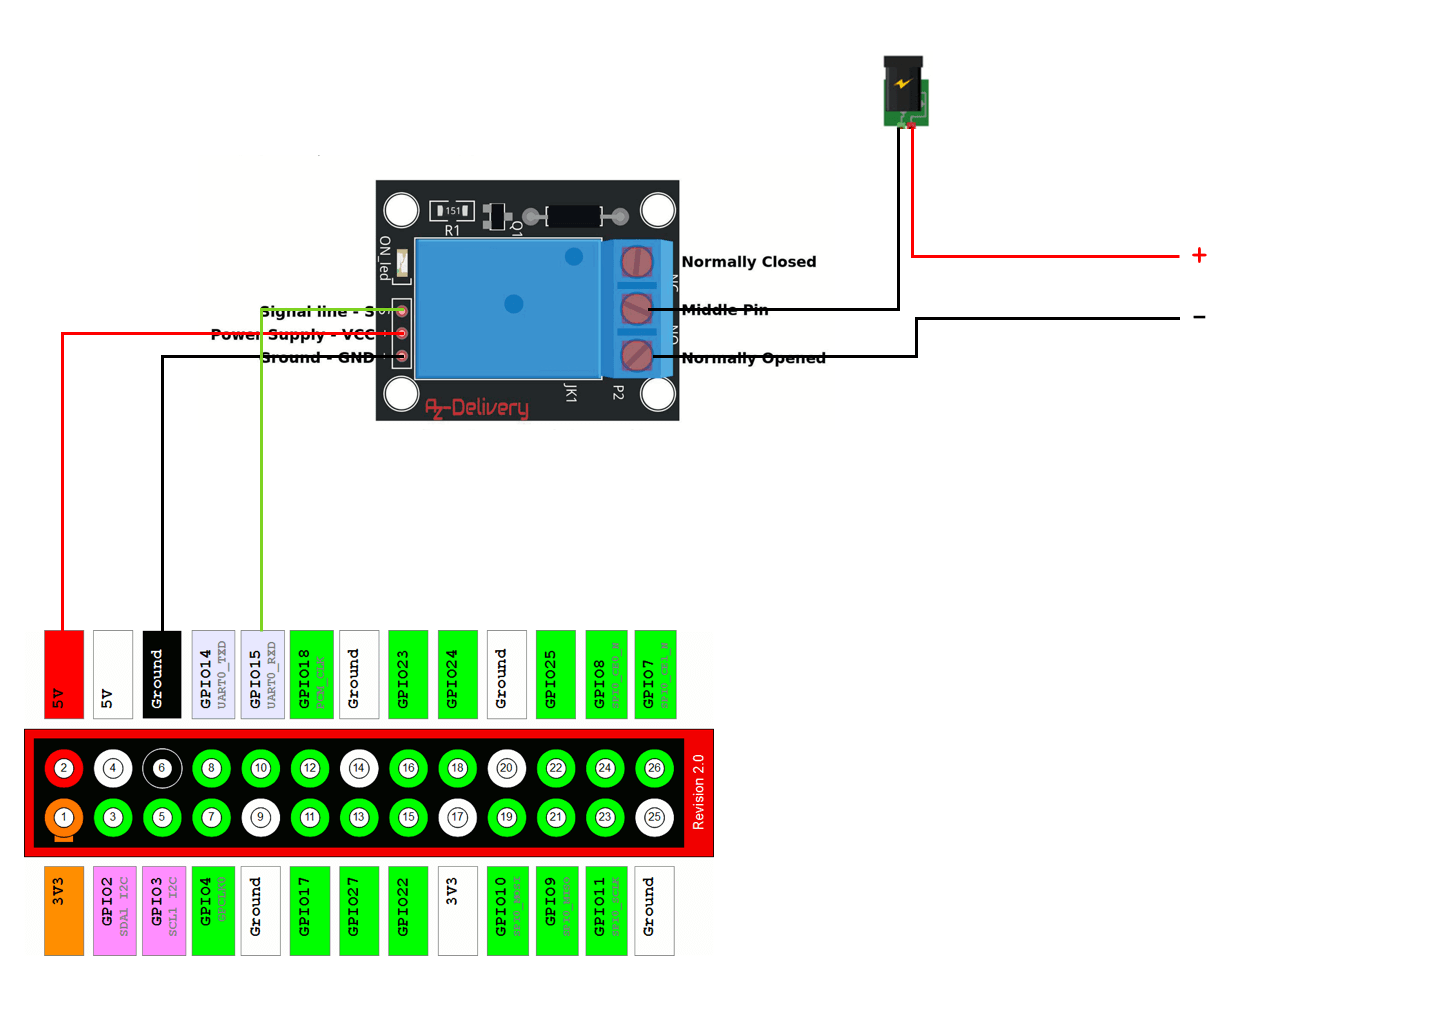
Circuit Diagram
Code
import RPi.GPIO as GPIO
from flask import Flask, redirect, url_for
import time

relayPin = 15  # Define the pin to be controlled

GPIO.setmode(GPIO.BCM)  # Choose BCM or BOARD
GPIO.setup(relayPin, GPIO.OUT)  # Set pin as an output
GPIO.output(relayPin, False)  # set pin value to 0/GPIO.Low/False

app = Flask(__name__)


@app.route('/', methods=['GET'])
def home():
    return "<h1>Hello</h1>"


@app.route('/success/<message>')
def success(message):
    return message


@app.route('/open_door', methods=['POST'])
def open_door():
    try:
        GPIO.output(relayPin, True)  # set pin value to 1/GPIO.High/True
        time.sleep(0.2)
        GPIO.output(relayPin, False)  # set pin value to 0/GPIO.Low/False
    except KeyboardInterrupt:
        GPIO.output(relayPin, False)  # set pin value to 0/GPIO.Low/False
        GPIO.cleanup()
    return redirect(url_for('success', message='success'))


if __name__ == '__main__':
    # Make the Raspberry Pi accessible in the same network through ip
    app.run(host='0.0.0.0')
See here for how to run the api after booting the raspberry pi.