How to Install Nginx on Ubuntu 20.04
Introduction
In this tutorial I’m going to cover how to install Nginx on an Ubuntu 20.04 server. Additionally I’m going to setup a simple website and create the configuration within Nginx to make the website available.
This article was first published at Hetzner Community: https://community.hetzner.com/tutorials/how-to-install-nginx-on-ubuntu-20-04
Prerequisites
- Setup Ubuntu 20.04
- A top-level domain, e.g. example.com
Step 1 - Login to server
Login to your server with your non-root user:
ssh holu@10.0.0.1
Step 1.1 - Update your server
After a successful login, we need to update our server.
For this we run the following command:
holu@10.0.0.1:~$ sudo apt-get update && sudo apt-get upgrade -y
Step 2 - Install Nginx
We will install Nginx with the help of apt.
For this execute the following command:
holu@10.0.0.1:~$ sudo apt install nginx
Step 3 - Update the firewall
In the previous tutorial we set up a firewall, which blocks all connections except the ones from OpenSSH. Now, to be able to use Nginx we need to allow it within the firewall.
Step 3.1 - List available ufw applications
To know what to activate within ufw we will first list all available applications, which we could enable.
holu@10.0.0.1:~$ sudo ufw app list
This will lead to the following output:
Available applications:
  Nginx Full
  Nginx HTTP
  Nginx HTTPS
  OpenSSH
- Nginx HTTP will only allow HTTP traffic and will open for this port 80.
- Nginx HTTPS will only allow HTTPS traffic and will open for this port 443.
- Nginx Full will allow both HTTP and HTTPS traffic and will open port 80 and 443.
You should only allow the most restrictive option for production. As we are still testing things out and haven’t setup SSL yet, we will choose Nginx HTTP.
Step 3.2 - Adapt the ufw configuration
To tell ufw that it should allow all HTTP traffic we need to run the following command:
holu@10.0.0.1:~$ sudo ufw allow 'Nginx HTTP'
Confirm your changes by running the following command:
holu@10.0.0.1:~$ sudo ufw status
It should output the following:
Status: active

To                         Action      From
--                         ------      ----
OpenSSH                    ALLOW       Anywhere
Nginx HTTP                 ALLOW       Anywhere
OpenSSH (v6)               ALLOW       Anywhere (v6)
Nginx HTTP (v6)            ALLOW       Anywhere (v6)
Step 4 - Check Nginx
Now that the firewall allows HTTP connections to Nginx we can check if everything works correct.
For this we’re going to check the status of **Nginx** with the **systemd** service:
holu@10.0.0.1:~$ systemctl status nginx
And if everything worked out correct, this should be your output:
● nginx.service - A high performance web server and a reverse proxy server
     Loaded: loaded (/lib/systemd/system/nginx.service; enabled; vendor preset: enabled)
     Active: active (running) since Sat 2021-08-21 17:54:37 CEST; 21min ago
       Docs: man:nginx(8)
   Main PID: 6370 (nginx)
      Tasks: 2 (limit: 2280)
     Memory: 4.1M
     CGroup: /system.slice/nginx.service
             ├─6370 nginx: master process /usr/sbin/nginx -g daemon on; master_process on;
             └─6371 nginx: worker process
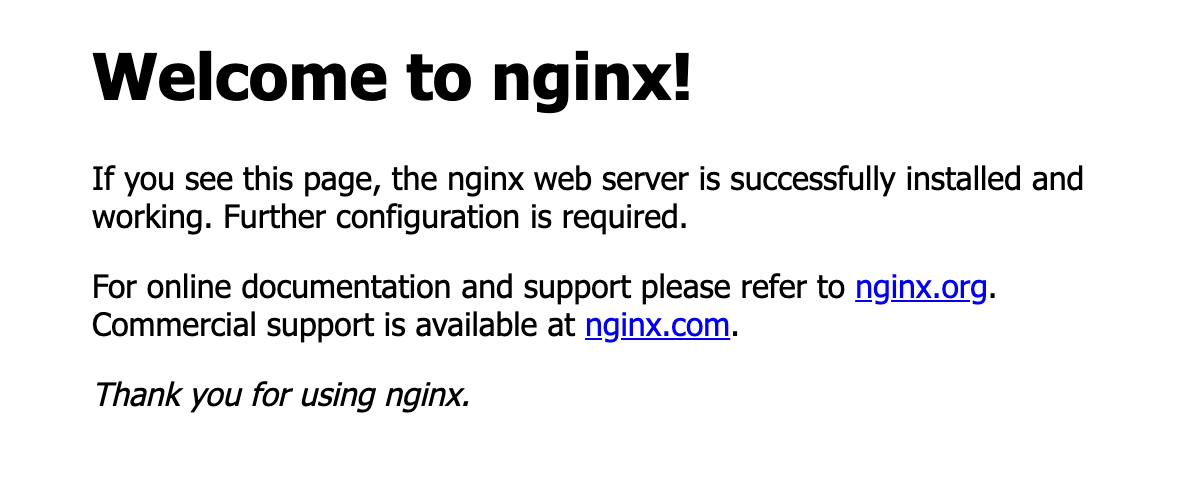
We can also verify the status by navigating to our IP address in the browser:
http://10.0.0.1
You should be greeted by the following message:

Step 5 - Configure a website
Now, we are going to configure a test website and point our domain example.com to it.
Step 5.1 - Create the content directory
The content which will be provided by Nginx can be found here: /var/www/.
Currently there is only the html directory which contains the webpage we just saw.
For our new website we are going to create a new directory.
holu@10.0.0.1:~$ sudo mkdir -p /var/www/example.com/html
Before continuing we need to verify that our new directory has the right permissions. We do this with the following command:
holu@10.0.0.1:~$ sudo chown -R $USER:$USER /var/www/example.com/html
Step 5.2 - Create a sample website
After creating the directory we are going to create a simple index.html:
holu@10.0.0.1:~$ sudo nano /var/www/example.com/html/index.html
Insert the following sample content or create your own message!
<!doctype html>
<html>
  <head>
    <title>This is our test website</title>
  </head>
  <body>
    <p>Hello, holu!</p>
  </body>
</html>
Step 5.3 - Configure Nginx Server Block
Now that we have our website ready we need to create a so called Server Block which tells Nginx where to point requests for our server to.
For this we are creating a new file within the /etc/nginx/sites-available directory:
holu@10.0.0.1:~$ sudo nano /etc/nginx/sites-available/example.com
Add the following basic configuration and adapt it to your directory and domain:
server {
  listen 80;

  server_name example.com;

  root /var/www/example.com/html;
  index index.html;

  location / {
    try_files $uri $uri/ =404;
  }
}
You can find other example configurations here.
Step 5.4 - Activate the Server Block
To enable the Server Block we need to create a link of the file which points at /etc/nginx/sites-enabled/.
holu@10.0.0.1:~$ sudo ln -s /etc/nginx/sites-available/example.com /etc/nginx/sites-enabled/
Step 5.5 - Adjust the server_names_hash_bucket_size
A good explanation for this problem can be found here.
To circumvent it we need to adjust the nginx.conf:
holu@10.0.0.1:~$ sudo nano /etc/nginx/nginx.conf
Find the following line:
# server_names_hash_bucket_size 64;
And uncomment it. It should look like this now:
server_names_hash_bucket_size 64;
Step 5.5 - Test Nginx configuration
Now, that all necessary changes were made we can test our Nginx configuration.
For this execute the following command:
holu@10.0.0.1:~$ sudo nginx -t
If your output looks as following you did everything right!
nginx: the configuration file /etc/nginx/nginx.conf syntax is ok
nginx: configuration file /etc/nginx/nginx.conf test is successful
Step 5.6 - Reload Nginx
After confirming our setup of Nginx we can now reload it and make our changes active.
holu@10.0.0.1:~$ sudo systemctl restart nginx
We can now visit our new website. Browse in your browser to http://example.com and you should see our simple test website.

Conclusion
We were able to install Nginx and configure it to point to our new website.
To add an SSL Certificate to your website follow this article: Add SSL Certificate with Lets Encrypt to Nginx on Ubuntu 20.04